Electric vehicles are marvels of modern technology, but they’re also incredibly complex machines. One of their most critical and vulnerable components is the battery pack. Recently, our CTO at Greentec Auto, Art, who is a seasoned expert in electric and hybrid vehicle battery refurbishment and RND, revisited a familiar but troubling sight: a flooded Tesla battery pack. In his latest video, he provides an in-depth analysis of what went wrong, why it happened, and what you should know if you’re considering a Tesla Battery replacement, especially if you’re thinking of doing it yourself.
The Anatomy of a Flooded Tesla Battery
About a decade ago, Art shared a video about a flooded RAV4 Tesla battery. Now, he’s back examining a similarly waterlogged Tesla battery, offering valuable insights into how such damage occurs and, more importantly, how to prevent it.
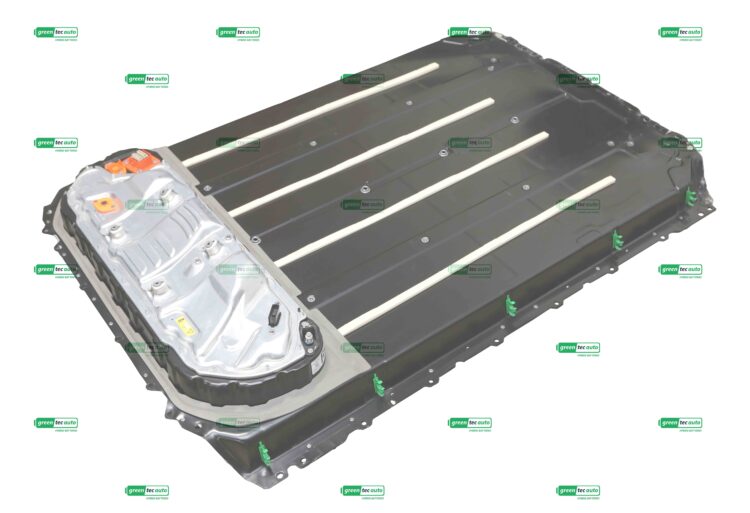
This particular pack came to Greentec as a “core” , a battery that’s been rebuilt by someone, either a DIY enthusiast or a local shop. It was clear from the moment we opened it that the Tesla battery had been poorly serviced. According to Art, the main culprit was a bad gluing job when resealing the battery lid.
Where Did the Tesla Battery Replacement Go Wrong?
As Art explains, the Tesla battery was flooded due to several avoidable mistakes in the resealing process:
1. Poor Glue Contact and Incomplete Sealing
Around the entire perimeter of the battery, the fresh glue failed to make proper contact with the lid. In fact, much of the old glue was left on during the attempted resealing, preventing the new adhesive from creating a watertight bond. In some sections, there was no glue contact at all.
2. Wrong Type of Glue
Even where fresh adhesive was applied, it was sometimes the wrong type for this application. A glue intended for another purpose can’t provide the same, watertight seal required for Tesla batteries.
3. Improper Bolt Pattern
Bolting down the lid in the wrong sequence created pressure points and even a slight “bubble effect,” further opening gaps along the seams where water could enter.
4. Deformed Lid Due to Incorrect Removal
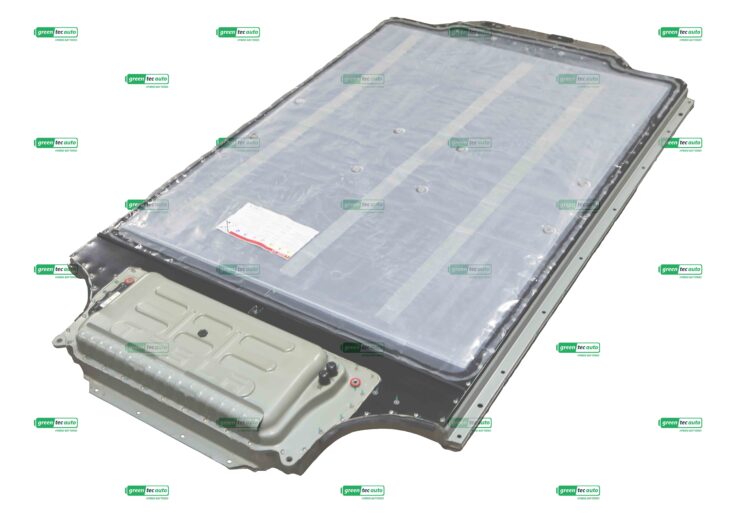
In their mess, previous handlers folded the battery lid up from one or both sides which is a shortcut nicknamed the “butterfly method.” This created a permanent valley or dip down the spine of the lid. Even with attempts to flatten it, the deformation made it impossible for the glue to seal those areas, leading to large, open gaps.
5. Cutting Corners Instead of Ensuring Quality Repair
The attempt to patch just the most obvious issues, instead of comprehensively servicing all modules and ensuring a proper seal throughout, left the battery vulnerable to water ingress in multiple places.
The Tesla Battery Replacement Aftermath
The result? Around four inches of water accumulated inside the battery. Even after being dried out for over a week, it was the worst condition Art had seen in a Tesla Battery pack. Water damage in EV batteries isn’t just cosmetic, it can corrode sensitive electronics, reduce performance, and, in the worst cases, lead to dangerous short circuits.